
While checking in a unit on the Service Board (Service menu → Service Board.), required work can be added in the check in wizard. Required work will appear to technicians when they start work on the unit.
Click Check In to open the check in wizard.

Search for the Unit you want to check in and click Select

Click Next, You then have several options to add labor but for now we'll select VMRS then click a labor icon to open the labor activites associated with that system
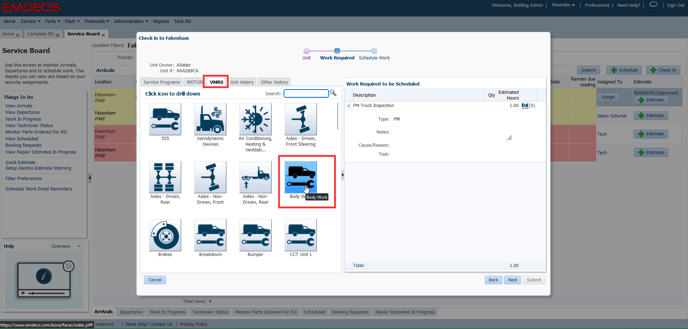
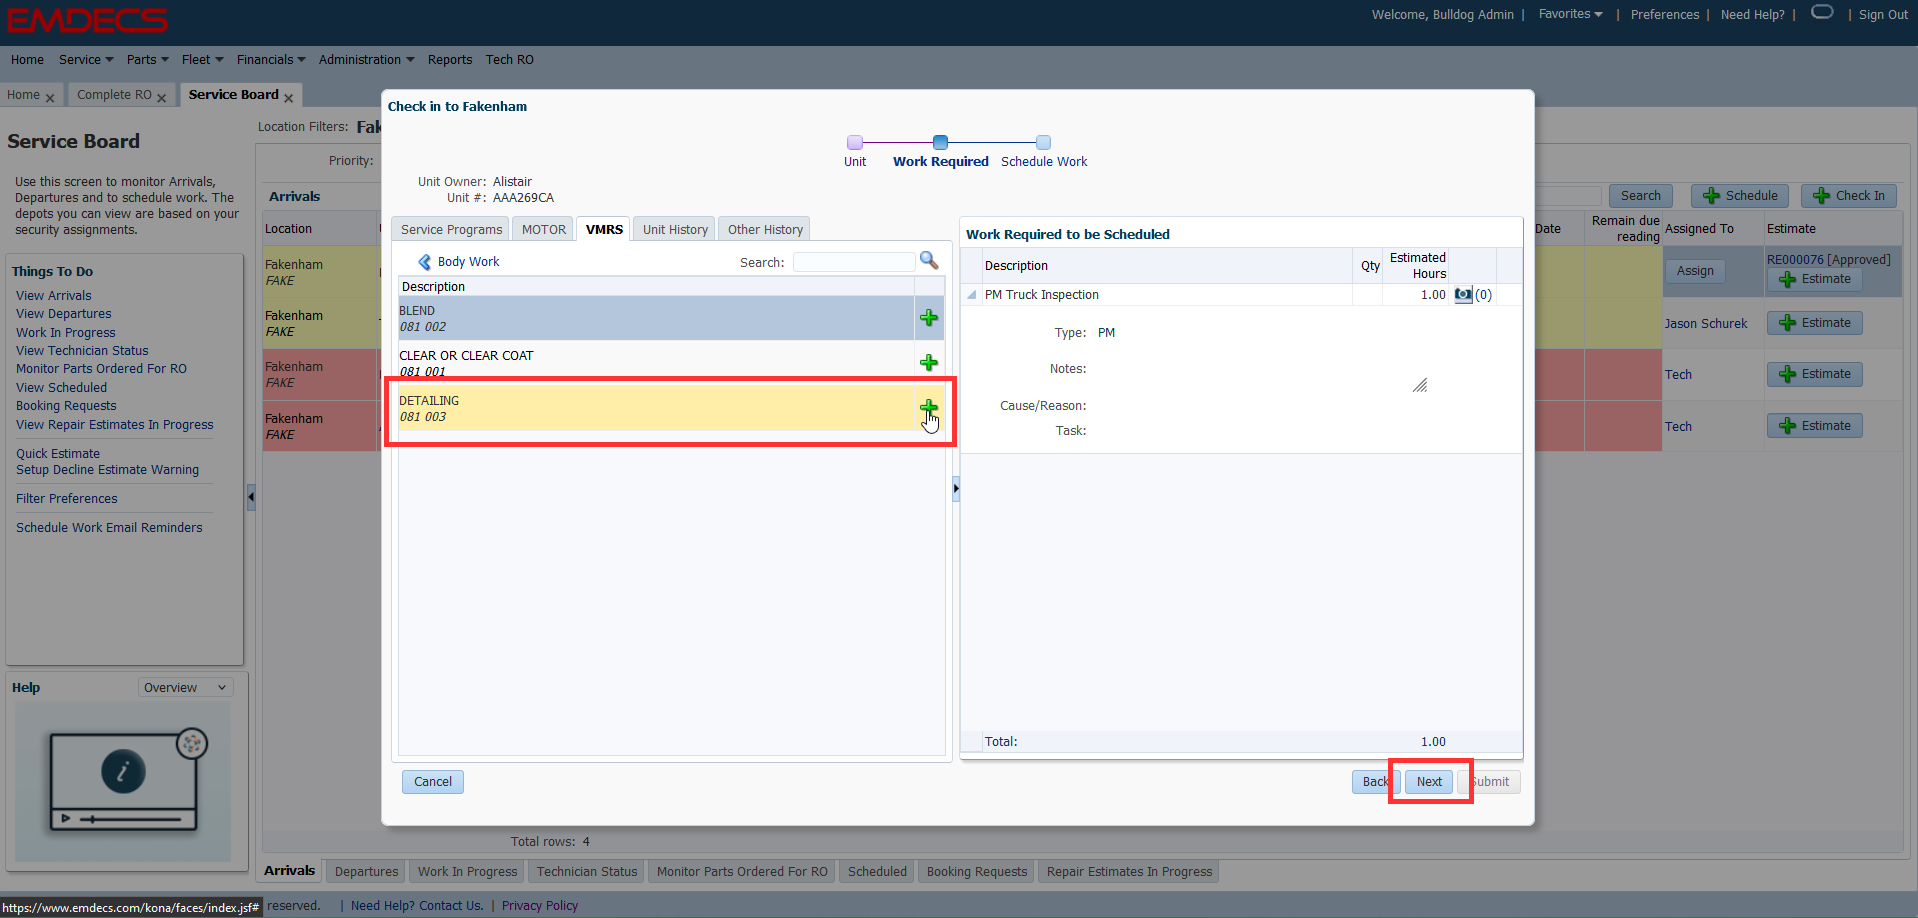
Click the green plus next to the labor activity to add it as work required. Repeat this step for all required labor activities for the unit, then click Next
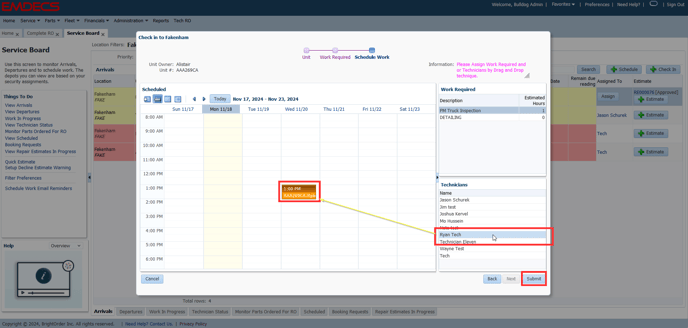
To assign a unit with required work to a specific technician, click and drag their name to a date/time slot on the calendar.
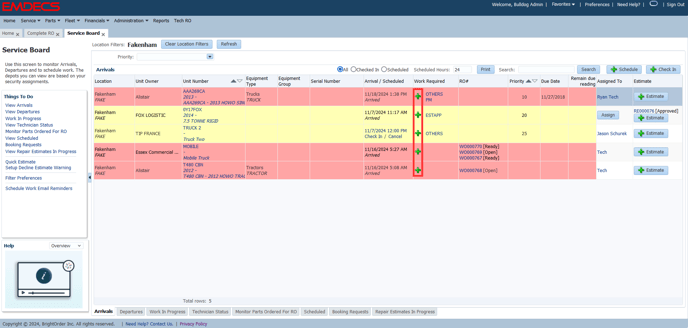
The unit will appear on the Arrivals board with a link to the required work and the name of the assigned technician.
Another way to add work required to a Unit is in the Arrivals tab on the Service Board.
Click the green plus under the Work Required column to add additional required work for the unit.
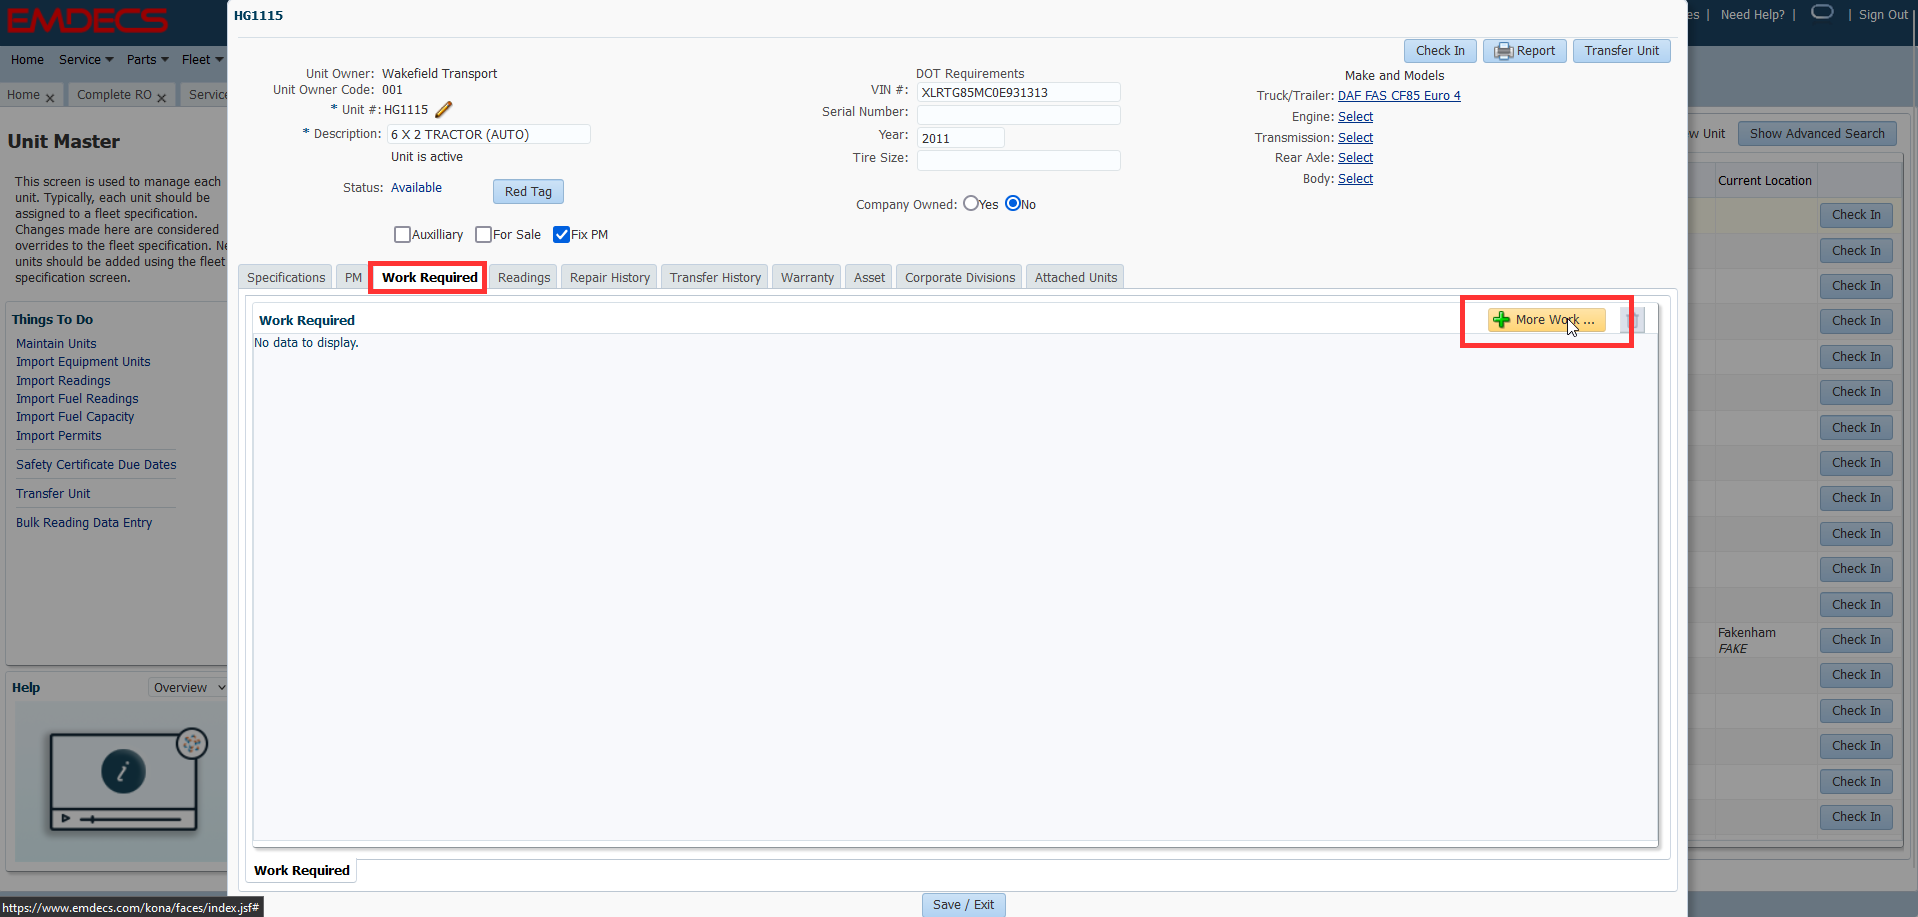
Unit Master
You can also add Work Required to a Unit from the Fleet → Unit Master screen.
Simply search and select the unit you wish to add Required Work to, Open the Unit's detailed information by clicking the Unit number.

Navigate to the Work Required tab and click '+ More Work...'
This will open your VMRS codes and Service Programs to add any necessary work required to the unit similar to adding work seen above.