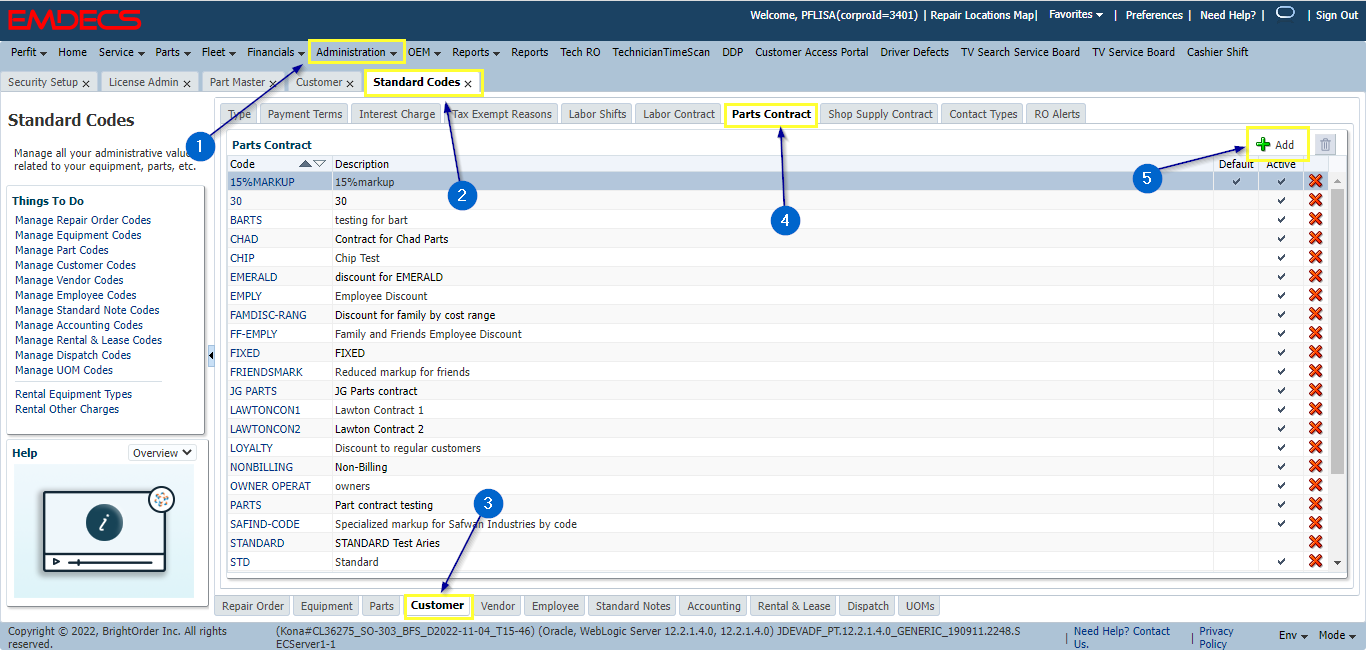
Administration Menu > Standard Codes > Customer > Parts Contract > Select ADD
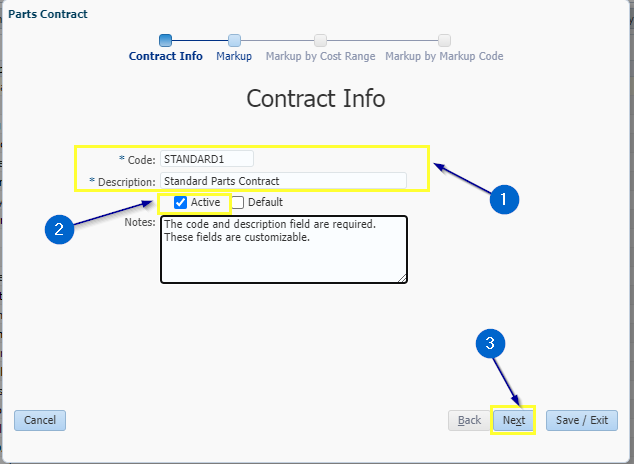
In the pop up box, you will need the fill out the code and description boxes. These fields are mandatory. The code and description can be customized. For example: The main default contract can be called, "standard". If the client would like additional contracts that are discounted by 15% for example, they could be called "15% discount".
Select Default to make the parts contract the default markup for any customers in EMDECS who are not assigned a specific contract.
Please fill in the code and description fields > select default > add notes if desired > click next
Markup and Discounts
The following markup fields are available:
Markup % : Enter a percentage to markup parts based on your default costing method (Average, Standard, Last, Landed, or Average Landed).
Discount % : Leave this field blank unless you want to maintain retail prices for all of your parts. If you enter a value here, the sale price of parts will be based on each part's retail price instead of purchase cost history. To sell parts at a fixed retail price, enter a percentage to discount off the retail price (enter 0% to sell at the retail price without a discount). If you want to sell parts above the retail price, using a retail price markup, enter 0% in field and then refer to the section titled Change Retail Prices in Bulk section for instructions on how to set retail markup percentages for parts in bulk.
Core Markup % : Enter a percentage if cores should be marked up differently from other parts. Leave blank for core markups to be the same as other parts.
Core Discount % : Only applicable when using the discount % option above. Enter a percentage if cores should be discounted at a different rate. Leave blank if cores should be sold at the same discount rate as other parts.
Sublet % : Optional. Enter a percentage to markup the cost of sublet parts.
You can enter markup percentages, or discount percentages, not both.
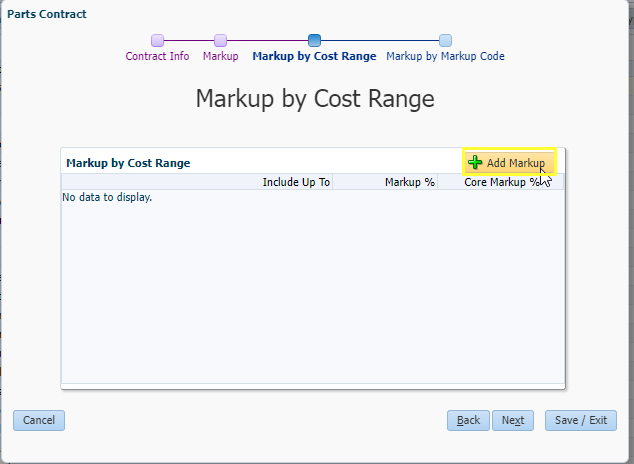
Markup by Cost Range
The Markup by Cost Range step is optional and only applicable when using a markup contract. You can click Next to skip this step. This is useful if you want to have different markup rates based on the cost of the part. For example, you might want a 50% markup on any parts that cost less than $10 while having a 35% markup on all other parts. Note - markup by cost range cannot be used with a discount contract.
To add cost range markups, click Add Markup .
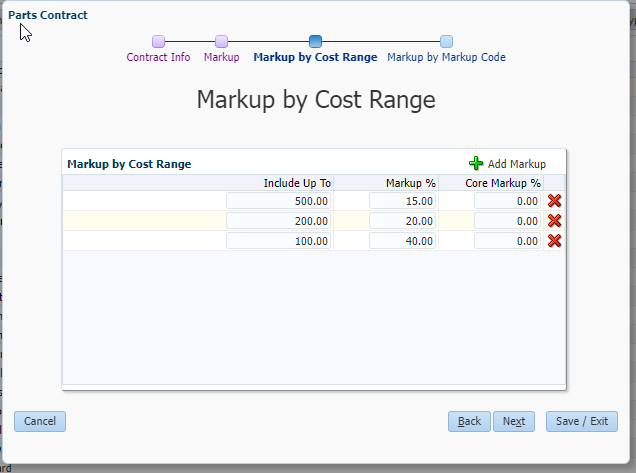
Each time you click Add Markup , a new line will appear in the Markup by Cost Range section. Enter the cost of the parts to be included in the markup in the Include Up To field, the markup %, and a core markup % if your markup should be different for core parts. With multiple cost range markups entered, you have the flexibility to vary your markup rates for different part cost ranges, as pictured in the example above. Click Next to continue.
Markup by Markup Code
The Markup By Markup Code screen is optional. You can click Save / Exit to save your new parts contract without adding markup codes. Markup codes are useful if you need to price or markup groups of parts differently from other parts in EMDECS. For example, if you need to sell oil filters with a different markup percentage from other parts, this can be accomplished by creating a markup code. If this is applicable for your repair shop or parts counter, this section will walk you through how to create markup codes with contain different markup groups for those parts with different markups.
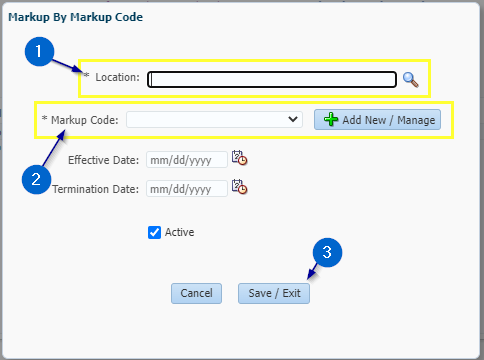
To set up Markup by Markup Code click Add
Here, the location is required. Also, if you have not created any markup codes in your system the Markup Code drop-down list will be blank. Click on Add New / Manage to create your first markup code.
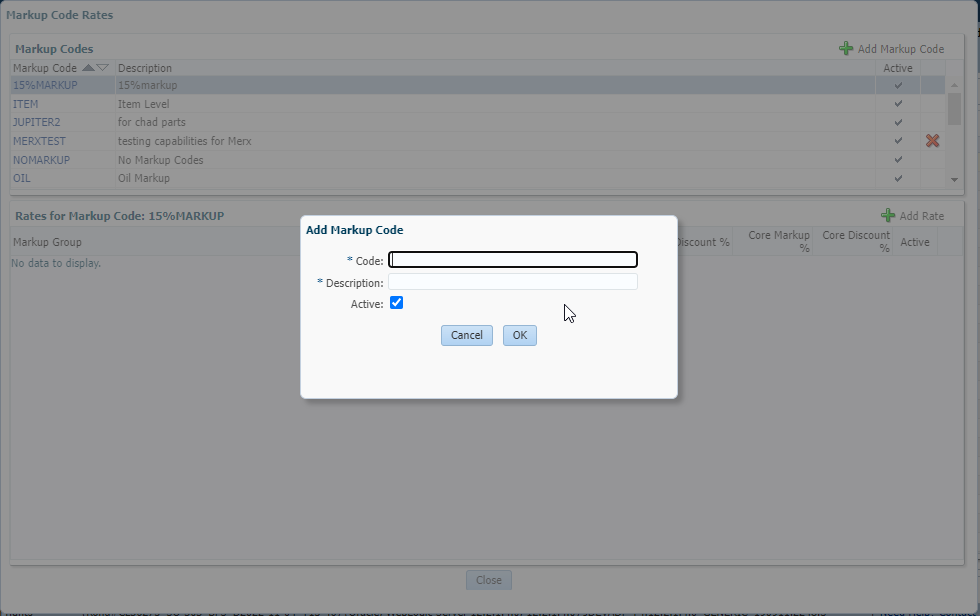
Each markup code can have multiple markup groups with different rates. Begin by adding a markup code. Click Add Markup Code .
You will then have a pop-up where you add the new markup code. The code and description fields are mandatory. Once complete, click OK.
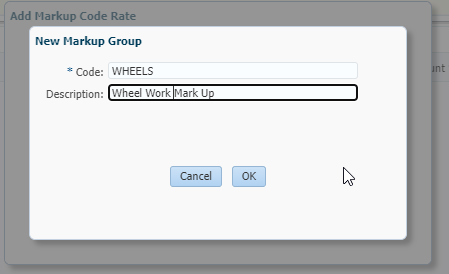
In the example pictured below, I've created a markup code named WHEELS. After adding a markup code, rates need to be added. Click Add Rate.
Enter the markup percentage or discount percentage. The core fields should be left blank, unless you want to markup or discount core parts at a different rate. Click OK to save.
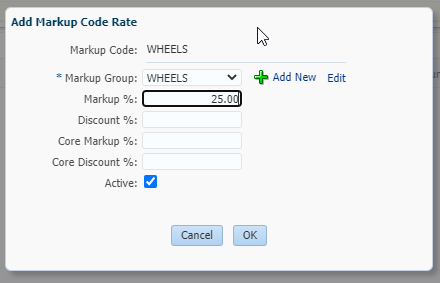
In the example pictured below, a new markup group named WHEELS, with a 25% markup rate, has been added under the WHEELS markup code. Additional rates can be added by clicking on Add Rate again. If you are finished you can now click Close.