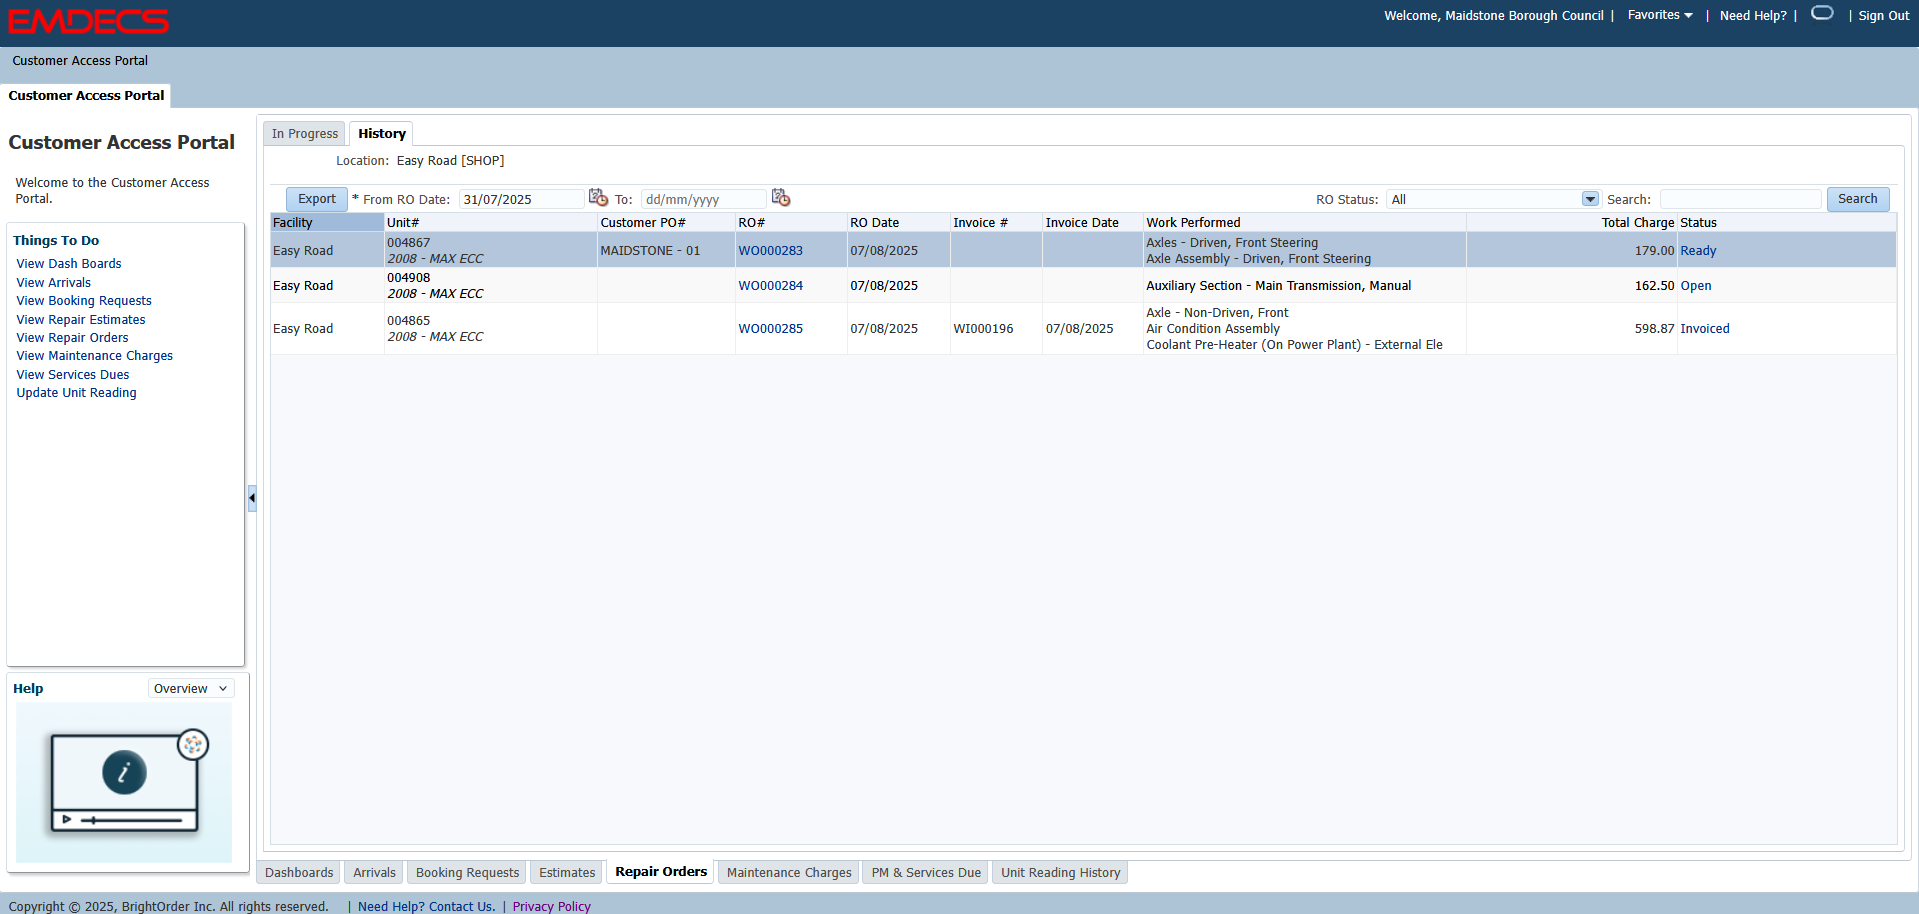
Customer Access Portal - Customer Side
This User Guide covers the Customer Access Portal from the customer use side.
The Customer Access Portal allows users to:
- Submit and Dispute Booking Requests
- Approve/Dispute Estimates
- Approve/Dispute Final Invoicing (Optional)
- Update Customer PO Numbers
- Update Unit Readings
- View PM Schedules and related Unit Information (Not covered in this guide)
Step 1 - Submit a Booking Request
One of the first things a user will be able to do upon signing into the Customer Access Portal is to create a new Booking Request for a Unit listed in EMDECS
If EMDECS does not list your unit, you can create a new unit from the Customer Access Portal using the +New Unit field
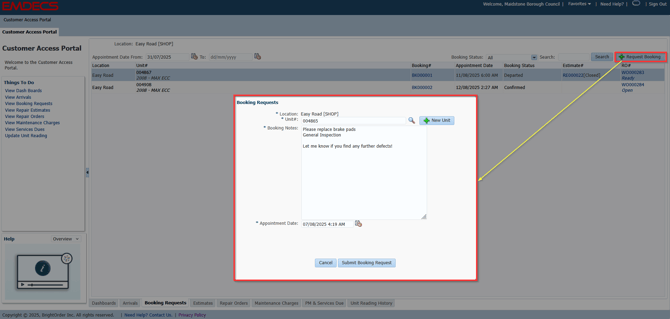
Booking Requests will be displayed with your requested Date, Time, and Booking Notes on the Shop Side of the system
Submitted Booking Requests will be displayed alongside their Status on the Booking Requests tab in the Customer Access Portal

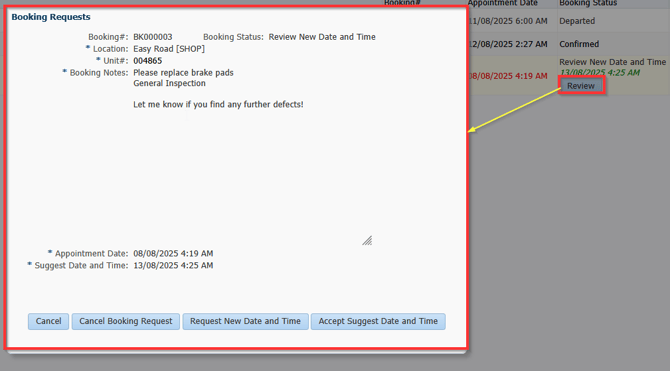
If the Shop is unable to perform the work at your suggested date/time, they may wish to modify the Booking Request. In the example below we can see that the shop confirmed one request, however, they Suggested a new Date/Time for the second request
This information is displayed within the Booking Request tab on the Customer Access Portal

Selecting Review allows the customer to further suggest a new Date/Time. This process may go back and forth until a confirmed time is accepted by both parties
Once a Booking Request has been accepted, the Shop will begin creating an estimate once the vehicle has been assessed
Step 2 - Reviewing Estimates
Shops can either create an Estimate at the time they receive the Booking Request, or they can just approve the booking request and create the estimate at a later date
Submitted Estimates can be found on the Estimates Tab of the Customer Access Portal Screen under Pending Approval as displayed below
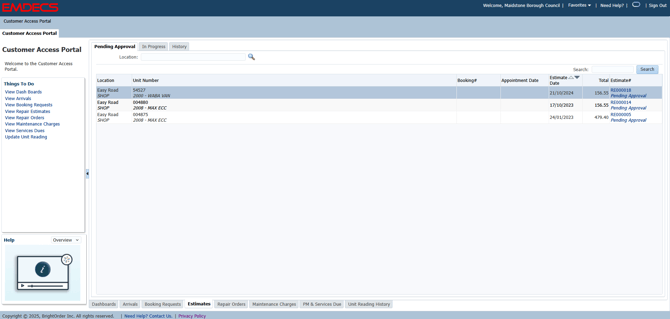
Clicking on one of the Estimate Numbers, such as RE000005, will allow users to Decline, Dispute, or Approve the estimate

Decline - Will decline the Estimate completely and end the process unless a new Estimate is generated
Dispute - Customers will be able to dispute individual Labour and Parts on the Estimate
Approve - The Estimate will be approved and will generate "Work Required" on the unit. The unit will be checked into the Service Board on the Shop side with Estimate Approved work listed
Disputing Estimates
When disputing an Estimate a popup window will appear where a user can Add Labour/Parts
You are able to dispute any specific labor line or part by checking off the "select" box.
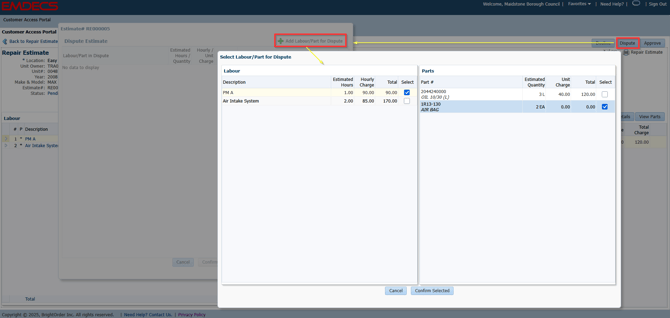
Dispute Notes will be required for every labour or part selected

Once finalized, disputed Parts/Labour will appear in Red
Dispute History will show a full log of all labour/part disputes and their associated note history!

The Estimate is now sitting with the Shop for further modifications based on the Dispute Notes entered
Once modifications have been made, Customers will be able to provide a final Approval of the Estimate by selecting the Labour Lines that are approved for work
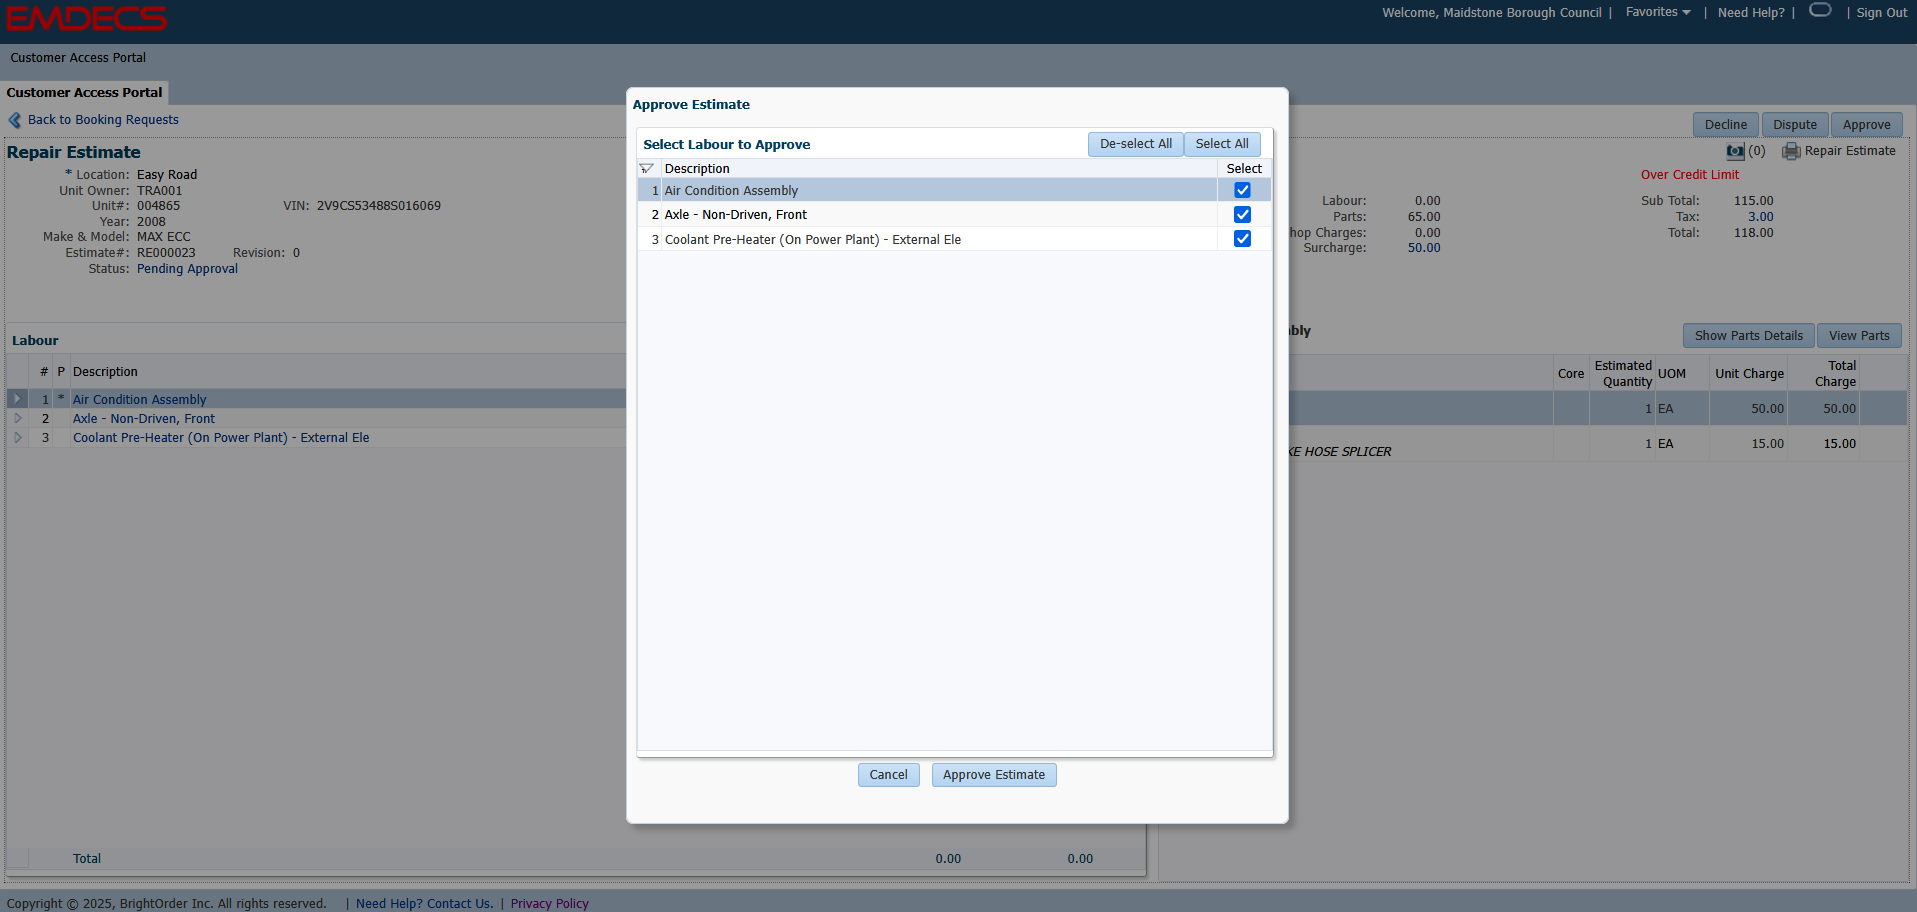
Selecting Approve Estimate completes the Booking Requests and Estimate process. The unit has now been checked into the Service Board with the Approved estimated labour lines available as Work Required.
The shop can then complete the Job and invoice out the Work Order Invoice
Step 3 - Authorize Invoicing (Optional)
Shops may set individual Customers using the Customer Access Portal to require Customer Authorization prior to Invoicing
If this has been set for your account, once an estimate is completed, and the work has been completed, there is a final step prior to invoicing where users can view Work Orders awaiting Authorization and approve them, which generates an invoice. You can view these through Repair Orders > History > RO Status: Pending Approval,
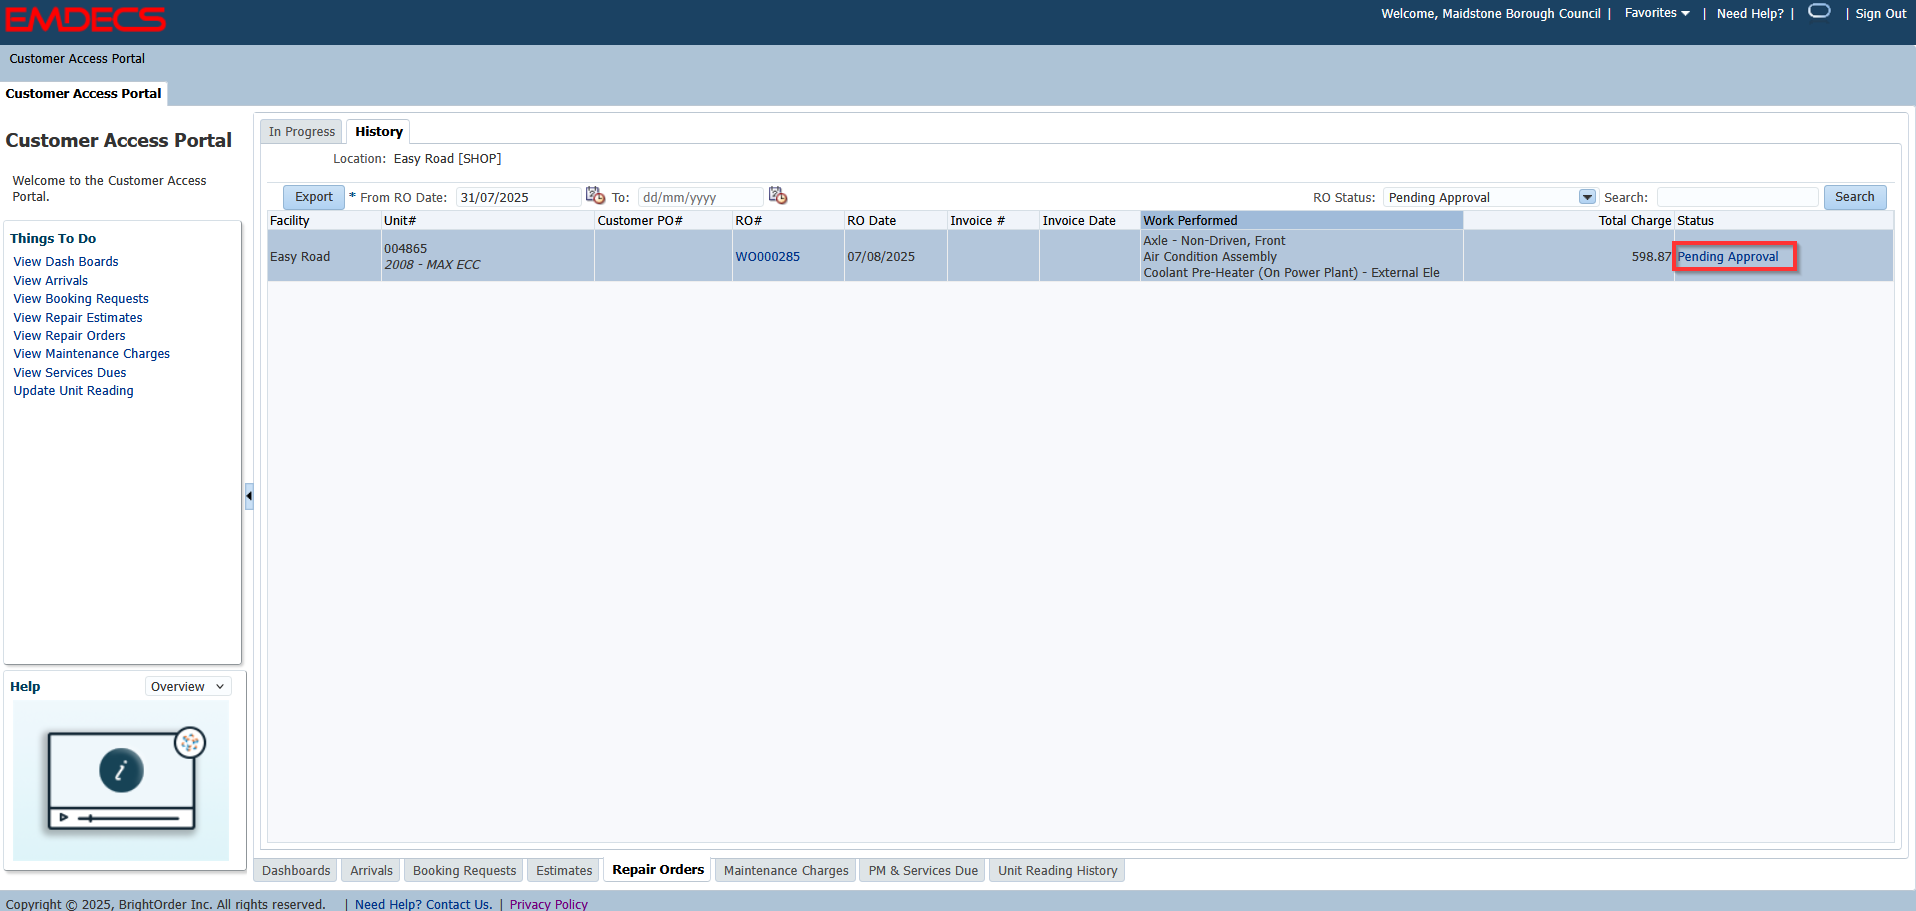
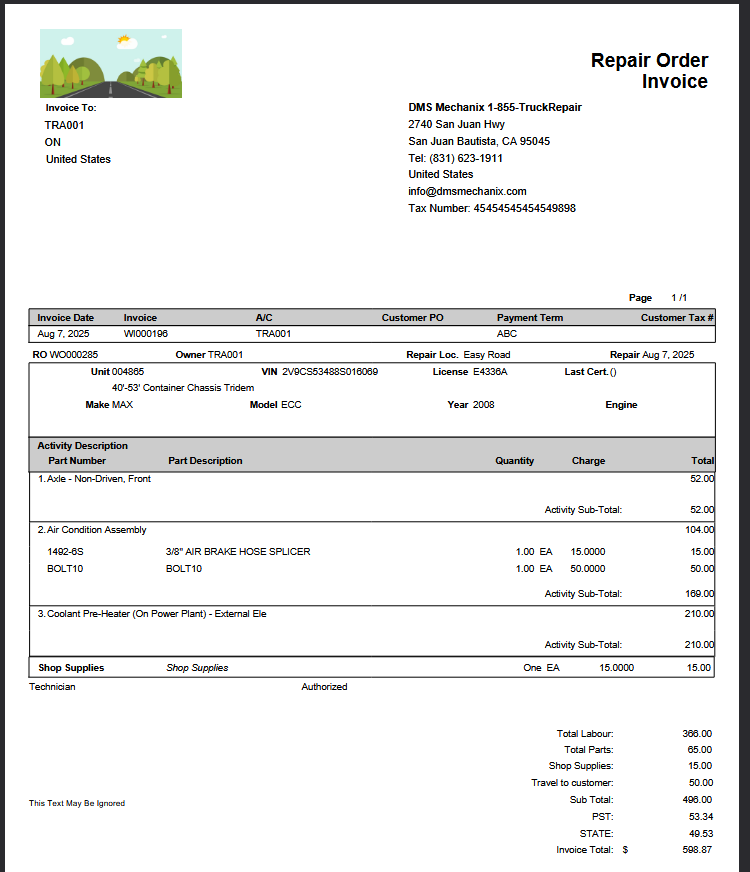
Users can review the invoice, Update the Customer PO Number (These can be added at any time as long as there is a work order #) and Approve the Invoice

This will generate a Work Order Invoice for the customer, and set the Work Order to an "Invoiced" status
Step 4 - Updating / Searching by Customer PO Number
From the Repair Orders - History tab, users can:
- Select a Work Order and Update the PO Number
- Review Historical Work Orders
- Search by Customer PO Number
- Export the data in the columns found on the screen
