
Video Walkthrough
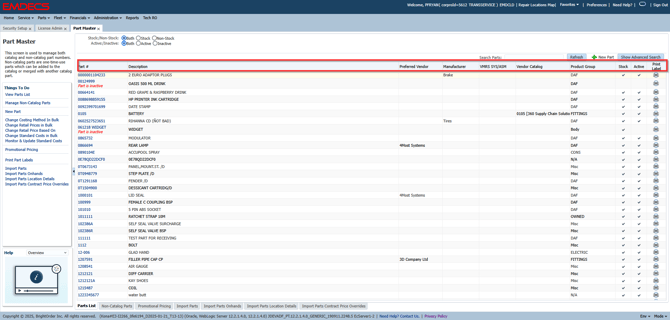
To manage parts in EMDECS, open the Parts menu and select Part Master
Parts List

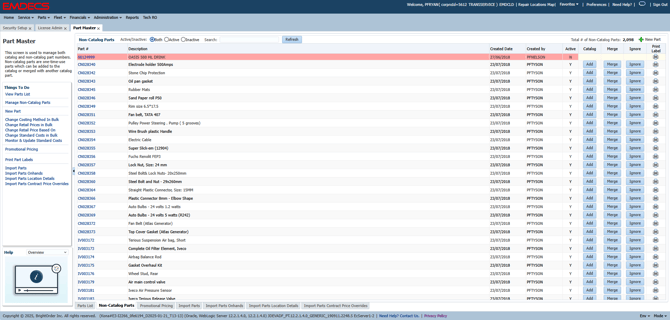
Non-Catalog Parts
Manage Part Settings
Active: Active parts can be issued on repair orders, sold in counter sales, received in EMDECS, etc. Parts cannot be deleted from EMDECS to ensure that part transaction history is always retained. Uncheck Active if a part number is no longer in use and is not in stock in any of your inventory warehouses.
Stock: Check this option if a part should be included in the Parts Catalog. Uncheck stock to move the part into the Non-Catalog Parts list.
Settings Tab
The following settings are available:
-
Product Group
-
UOM (Unit of Measure)
-
Markup Group
-
Warranty
-
Core Part #
-
Application
-
Inventory Line
-
Inventory Class
-
Count Cycle
-
GL Account Group
-
Weight & UOM for the entered weight
-
Notes
-
4. Add New Item Markup Group: Markup Groups require a Code and Description.5. Add a Part Warranty: Adding a new parts warranty code opens the New Warranty Schedule set up wizard. Click Next to continue.5.1 A warranty Program Code and Description are required. Notes are optional. If an extended warranty is offered on top of the base warranty, put a check next to Extended Warranty Purchased. Click Next to continue.5.2 The warranty coverage period can be defined using a Period of time and an optional reading value. The warranty will expire when either threshold is reached (i.e. after 30 days or 500 KM, whichever comes first). Click OK to save the new warranty schedule.6. Create a Core Linkage: You can select an existing part as the core, or to create a new part as the core part linked to the main part. Fill out the form and click Link Core to add the core part linkage.7. Add Inventory Line: Inventory Lines require a Code and Description.8. Add Inventory Class: Inventory Classes require a Code and Description.9. Add Count Cycle: Physical count cycles require a Code and Description.10. GL Account Group: Choose a GL account group form the drop down list. To create a new GL Account Group go to Administration > Standard Codes > Accounting > Part Account Groups11. Add Part Notes and Check Box Options: Notes can be added and check boxes provide settings for whether negative on hand quantities are permitted (this will be greyed out if your corporation is set up with a negative on hand restriction), a return policy, location requirement, tax exempt status, and serial number settings and initialization.12. Initialize Serial Numbers:To initialize serial numbers, a unique serial number needs to be linked to each on hand part in inventory. Click Add to input the serial numbers then click Initialize at the bottom of the screen.Note: There must be stock available in a Warehouse to add Serial Numbers.13. Other settings are found on the right-hand side as links that can be clicked on to specify additional settings and features, including:
- VMRS Restrictions
- Superseded
- Equivalents
- Barcodes
- Kit
- Features
14. VMRS Restrictions: A VMRS restriction will highlight a part in red when it is used on a repair order with a labour activity that does not match the selected VMRS codes. This serves as a reminder or warning for service technicians that they may be issuing the wrong part number for a job, or they may have selected the wrong VMRS code for the work they are doing.Selected system codes are displayed in the pane in the right hand side. To add additional system code restrictions, select them from the allowed system codes list on the left and then click on the right arrow to move them to the selected code list. Selected codes can be removed by clicking on them and clicking on the left arrow to move them to the left. Repaeat as necessary then click Finish to save the part VMRS settings.15. Superseded: The pop up window displays the Date the part was merged under the current part, along with the Part Number and its Description.16. Equivalents: Equivalent parts that can be used as a substitute are listed on this screen for reference. To add a part to the list, search for it in the Part # field, then click + Add.17. Barcodes: Vendor or manufacturer barcodes can be scanned and linked to the part on this screen. Using a barcode scanner, scan the UPC code and then enter the quantity of parts, and click +Add.18. Kit: Creating a kit is a reference for parts that are usually used together for a job. Search for a Part Number, enter a Quantity, then click Add to build a kit.19. Features: Click + Add to add additional part feature codes. To add new Feature options in EMDECS go to Administration > Standard Codes > Parts > Features & Values
Costs and Pricing Tab
Stock Availability Tab
Replenish Settings Tab
-
No Order: The part will not be re-ordered
-
90-Day Trend: Ordered based on its usage over the last 90 days
-
Min/Max: Orders are based on minimum and maximum stock level settings. Once the on hand quantity goes below the minimum, EMDECS will generate a reorder to restock up to the maximum on hand quantity. For example, if you have a min of 10 and a maximum of 20, once the on hand goes down to 9, EMDECS will suggest re-ordering 11 parts to restock up to the maximum of 20.
-
Just-In-Time: Orders are derived from a formula that considers usage history and preferred supplier lead time to estimate when the part should be re-ordered so it arrives just in time to be used. This helps reduce on hand stock levels so you do not sit on excess inventory. For assistance in adjusting the just in time formula, please contact our customer experience team
Location: Type in the location then select the location from the search results in the drop-down list.
Vendor: Type in the preferred vendor for the selected location above.
Effective Date: Defaulted to the current date and time. You can change the date and time if it should not take effect immediately.
Override Taxes and Surcharges Tab
Pictures Tab
History Tab