Logging In
Every Technician needs an Employee Badge and a Username in order to access the system. Technicians can share Users when logging in to the system when working from the same location on a shared device.
If using a separate device or the app, they should be given their own Username.
Video Walkthrough
Sign In Page
Enter the Username and Password
You can change the language that EMDECS will load in by clicking on the word ENGLISH
Once you are logged in, You'll need to open the Tech RO module.
Once open there are two ways the system may appear.
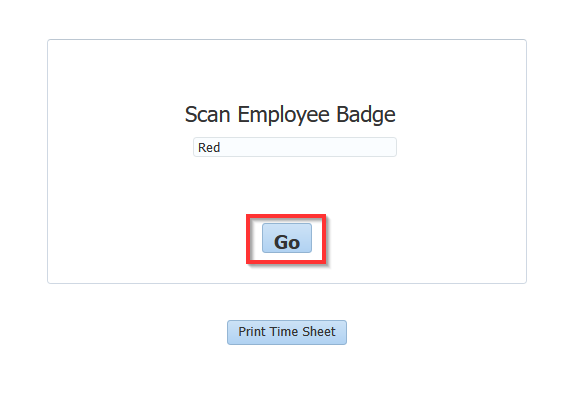
If you share a Username:
When sharing a Username, you would still have your own Badge assigned to you. Enter the Badge ID and press Go
If you have your own Username:
When you have your own Username, your Badge ID will be attached to help simplify login.
This needs to be done by an Admin and should appear as the above screen when linked
When Employee Badges are linked to users, sever the link before deactivating the User.
Tech RO: Selecting your location
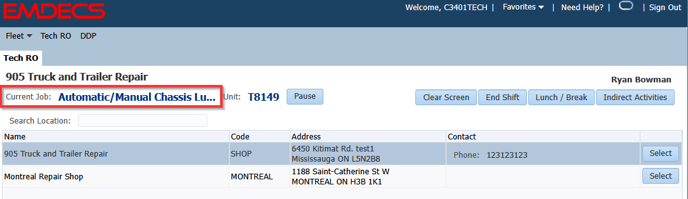
This is only relevant if your technician has been assigned to multiple locations. The first screen you'll see is a list of the locations, you'll decide here which one you're currently working out of. Your current job will be in blue in the top left-hand corner. Click on this to return to that repair order, otherwise, select which location you would like to load
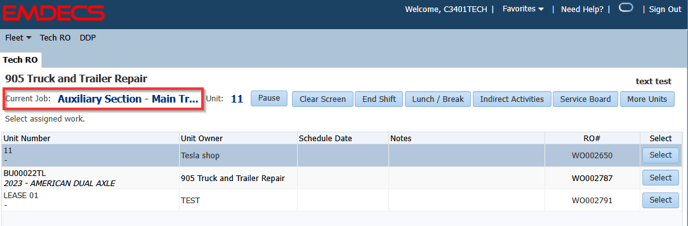
If you only have one location assigned you'll automatically be brought to the assigned work screen, more units, or service board. Typically you will see all the repair orders currently assigned to you. The current job is listed in the top left-hand corner still.
Explaining the Buttons

- Pause: This does not pause the clock, instead, it stops the counter on your current activity and stores the time until you've selected the next activity. At this point, any time that accrued since the button was pushed will be allocated to the new activity.
- Clear Screen: This will sign you out of the system, you will still be clocked onto the job but another technician can now sign-in to use the system.
- End Shift: This button stops the time accrual for the day and puts an END DAY stamp on the Technicians Time Card. If this is pressed by accident, please notify a User with Admin privileges in order to have the stamp corrected.
- Lunch/Break: Please do not use this function without direction from a User with Admin privileges as it requires setup
- Indirect Activities: as with #3, this requires setup within the Corporation. A pop-up window will appear; items listed might include Shop Cleaning or other tasks unassociated to an RO
- Service Board : This button will allow the Technician to be able to see all scheduled work, whether it has been assigned to them or not
- More Units : This button allows the Technician to create an RO from the list of available Units in the system
Working on an Assigned RO
Video Walk-through
Assigned Work
When signed in and viewing the assigned work tab you'll see a list of new and existing repair orders. Typically there will be no RO# on newer repair orders. While there is no repair order #, This will only appear on the service board and assigned work, this will not appear under work in progress until the technician clocks onto it. Press "Select" to choose which RO to work on
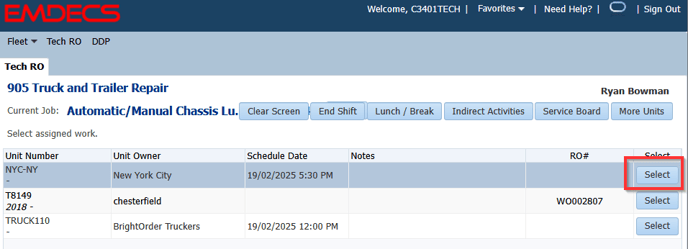
On a new RO, the Summary and Parts tabs will be greyed out until the labour line is selected.

Adding Labour to an RO
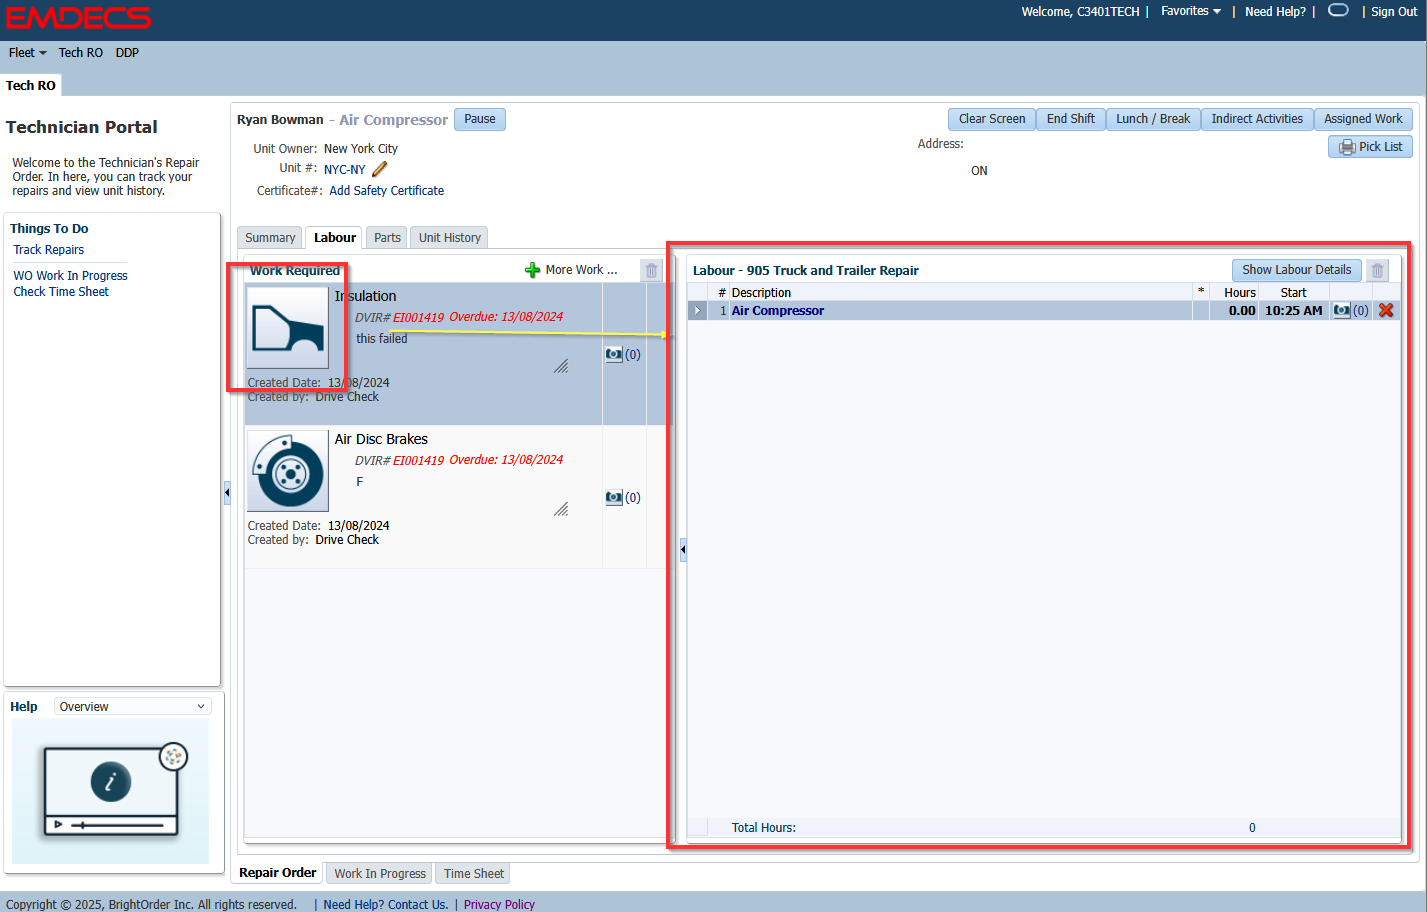
Labour can be added in several ways, First technicians can clock onto labor that is already tied to the unit under Work Required. You can clock onto labor by selecting one of the large icons under Work Required

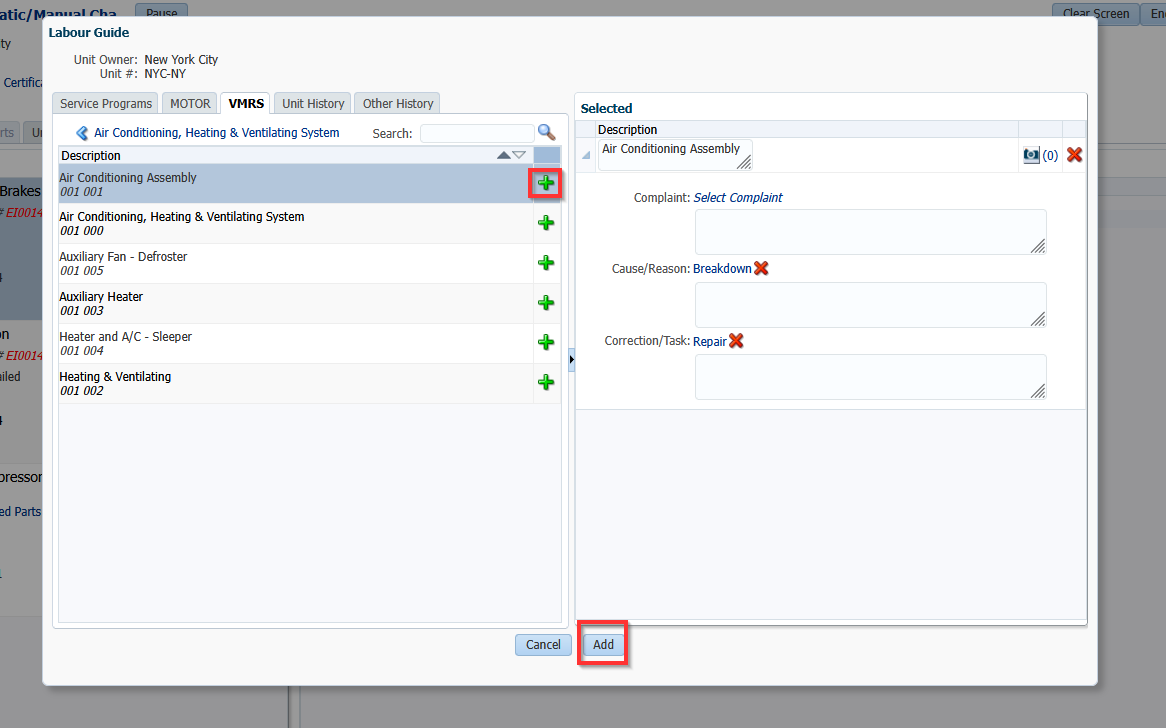
The second way is to press "More Work" this will bring up the Labour Guide screen

From here you can select a service program or VMRS Code, You can also access the past history of the unit and other equipment. To add this to the repair order select one of the large icons and and then the green plus sign. Then press Add, you'll also be able to enter the three C's and any other relevant notes.
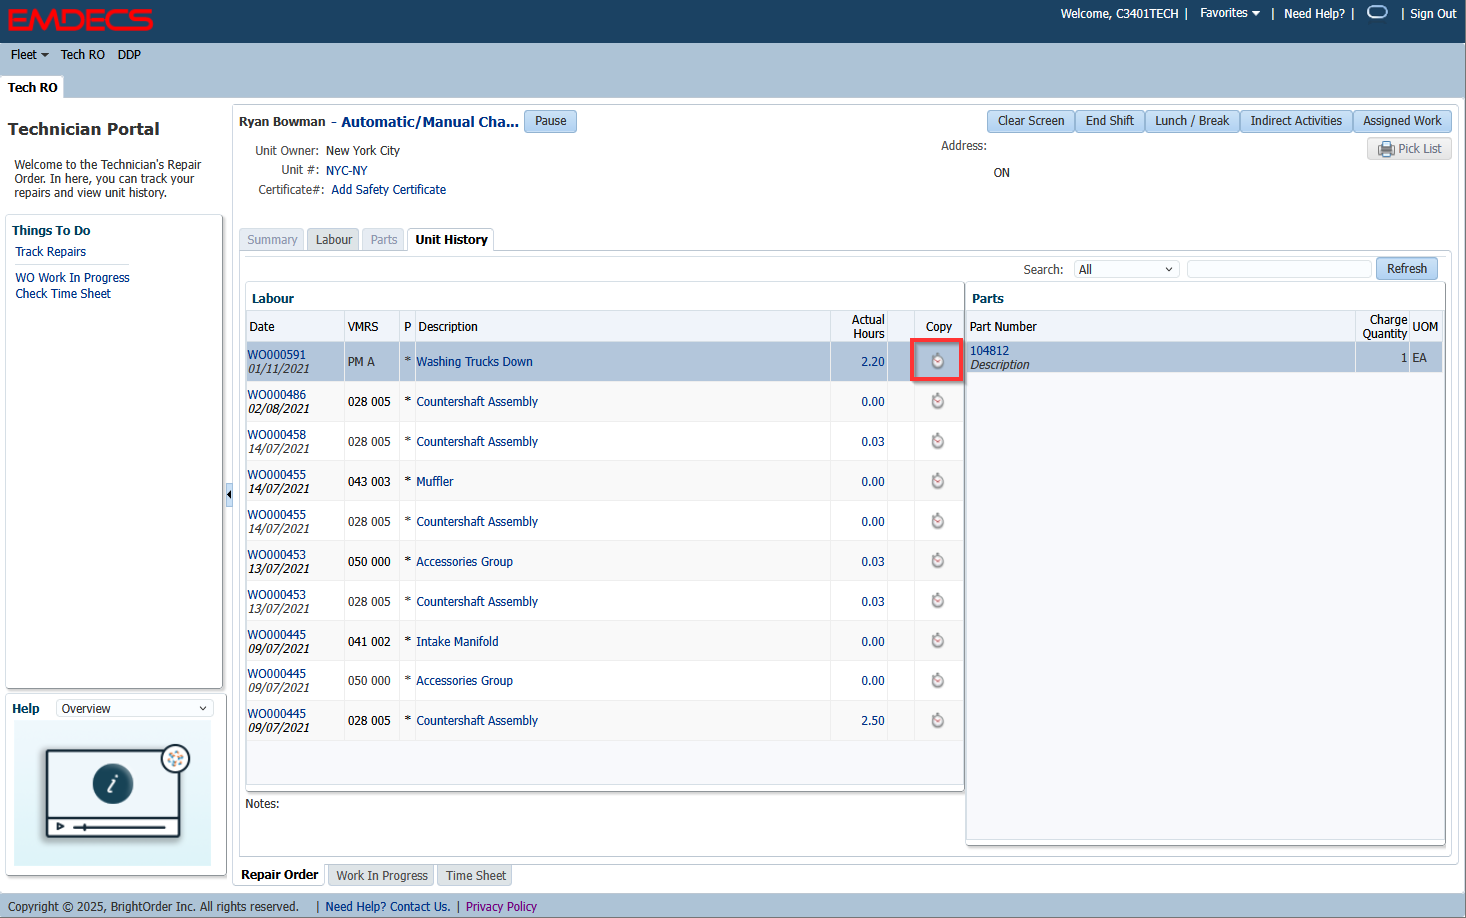
You can also access unit history on the repair order, it's next to the Labor and Parts tab. From here you can select a previously completed task. Press the clock Icon to copy the labour to the new RO
Once you've added the labor you want to clock onto it will move to the right-hand side of the screen and the clock will start on the task.
Adding Parts to an RO
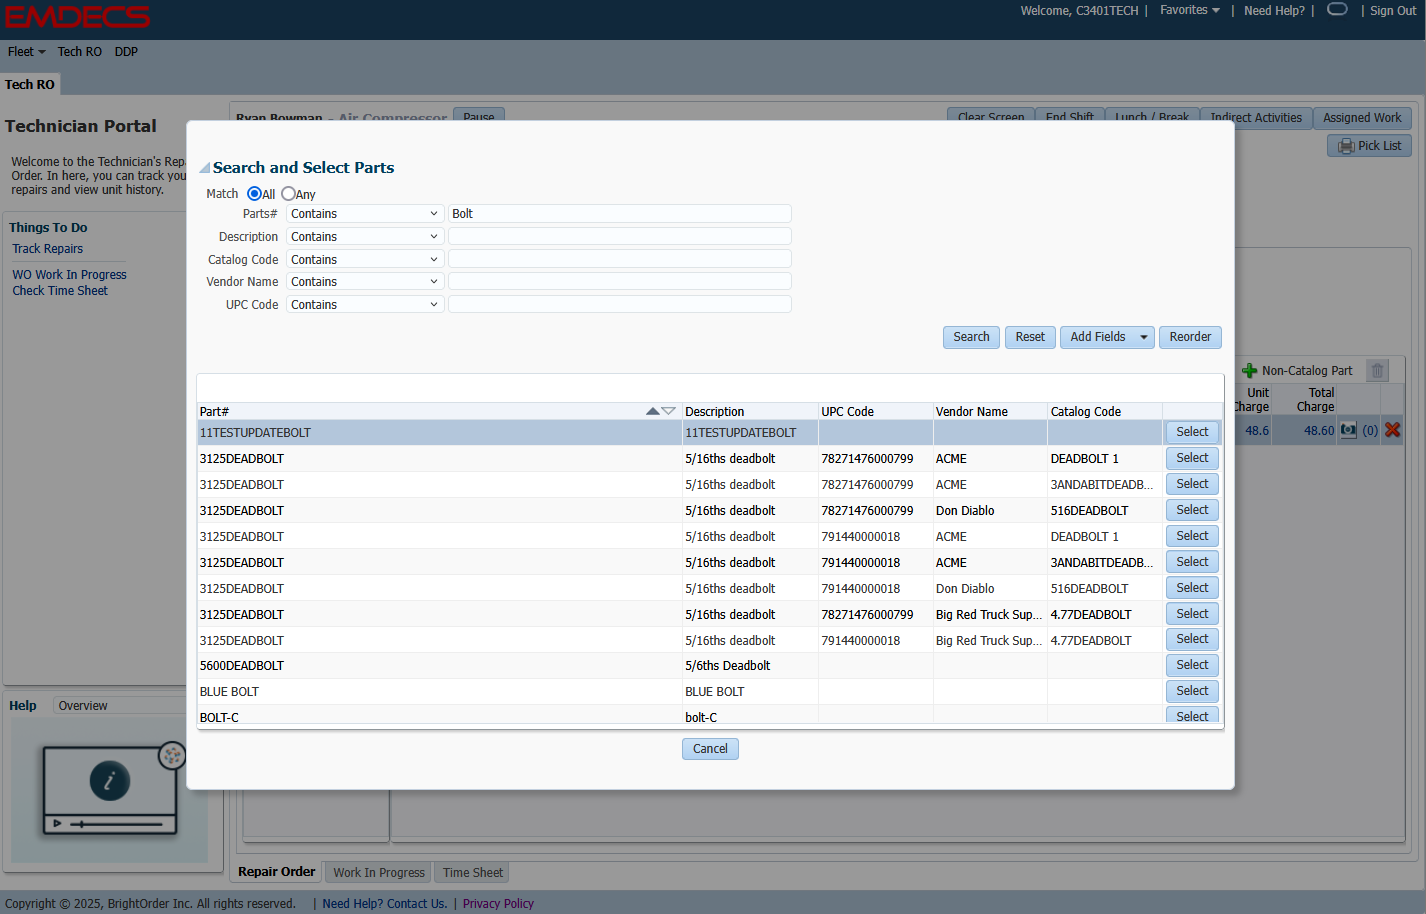
To add parts on a repair order you'll need to go to the Parts tab. Parts are assigned to the labor lines they'll be used on. From the parts screen you can either search for your part or use the advanced search by selecting the magnifying glass.

Click on the Magnifying Glass next to the Search Bar to access the advanced search
Once the Part is selected, the Warehouse information will be displayed on the right-hand side of the screen. This will allow you to see where the Part is located in the Warehouse, and whether there are any in-stock at the moment.
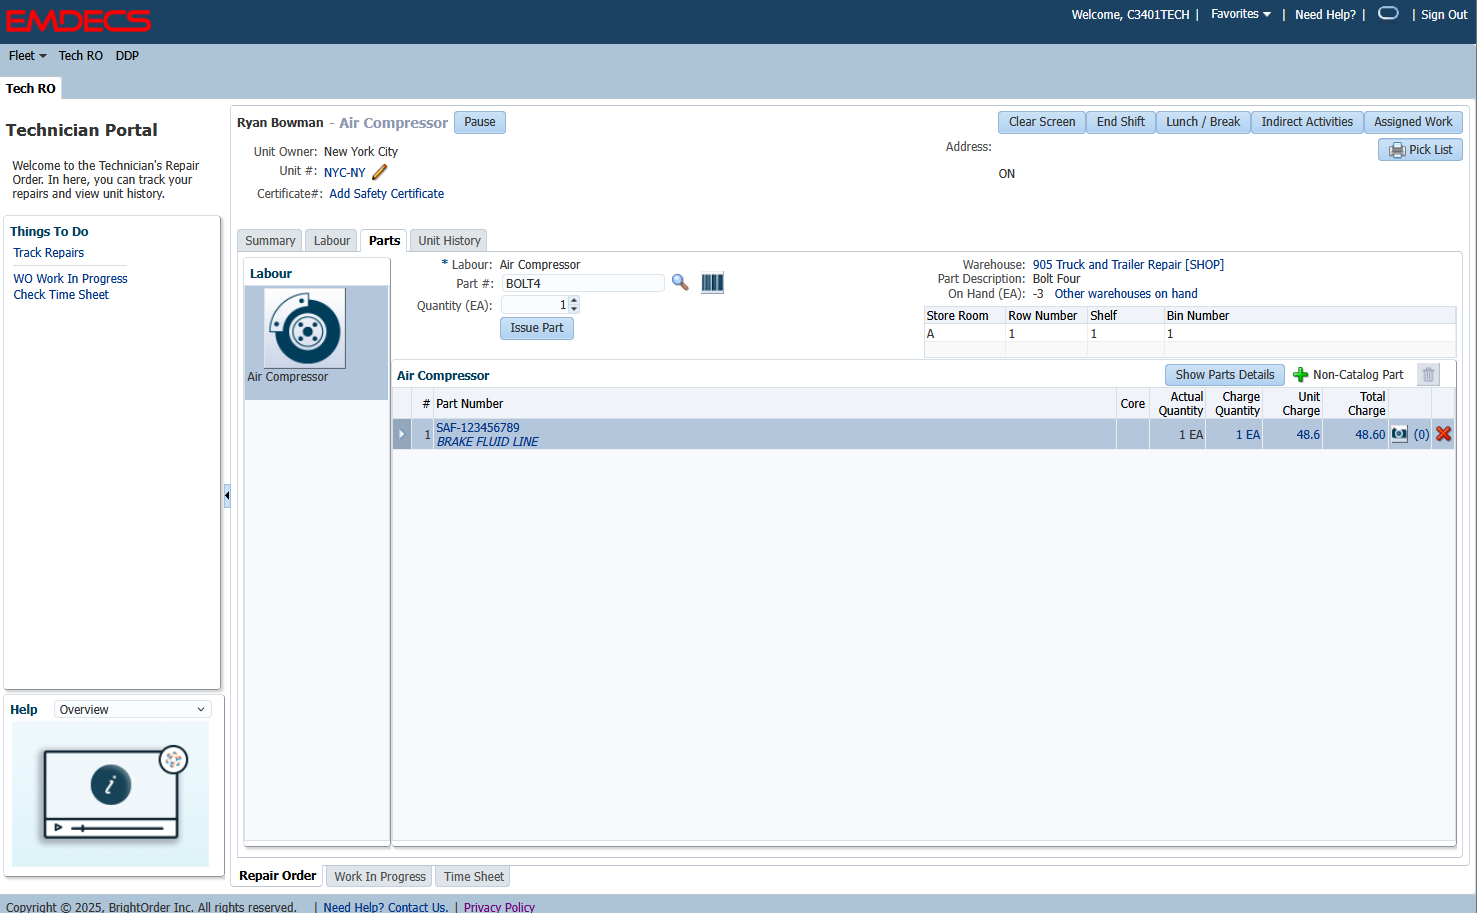
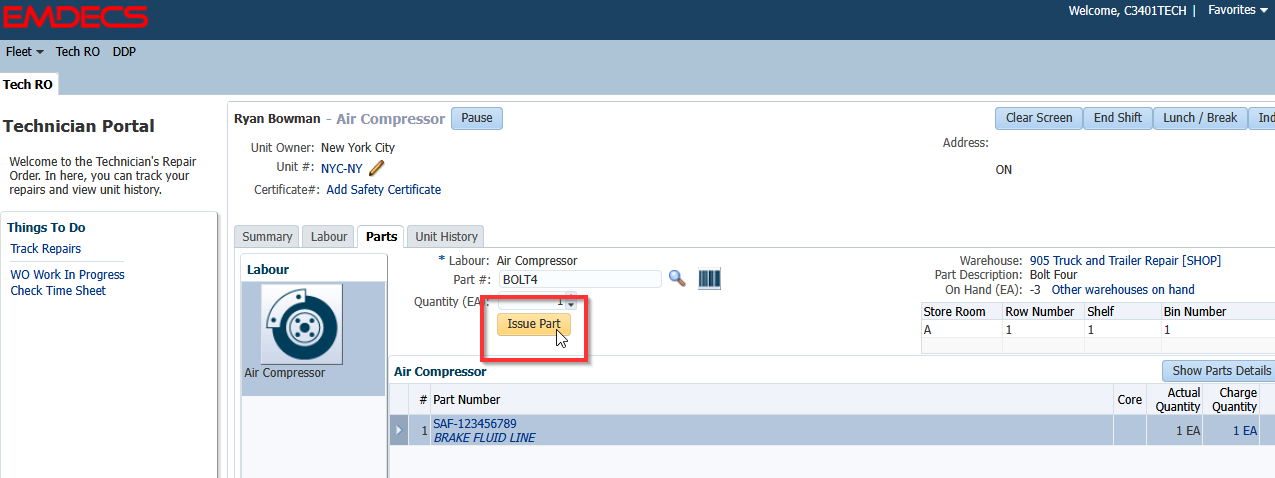
Now that you've selected and found your part you can enter your quantity and Issue the part
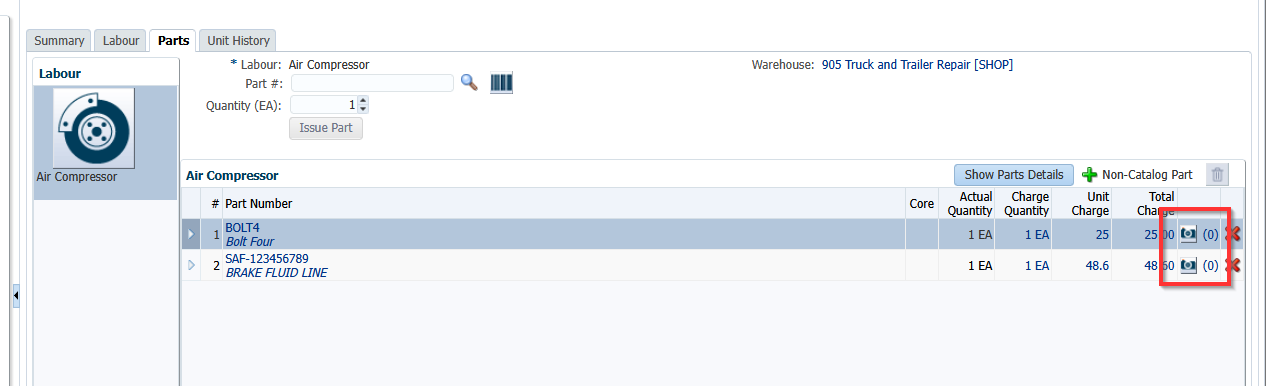
Once the part is added it will be tied to the selected labor line and appear underneath,

If the part is being replaced through warranty or you need to link any other important documentation you can upload it by clicking on the camera icon.
Filling in the 3C's
Click on the Arrow to the left of the labour line to expand the details. This will allow you to enter your 3C's and your notes
This can also be done from the Summary tab of the RO. Any Inspection Forms will appear here as well
Before you Unit Ready
Verify that all information has been filled out
1 - Meter : update the reading type for that Unit for PM tracking. May include hubodometer or engine hours as meter types
2 - RO# : This is system assigned. Allows admin to find the RO under Service Board ->Work in Progress
3 - Type : This can be switched to another code. These would be setup under Administration-> Standard Codes-> Type by an Admin
4 - PO Number : If you have been provided a PO number, enter it here
5 - Internal RO : If your Shop uses a different RO number to associate paperwork, enter it here
6 - Internal Notes : Any notes entered here will only be able to be seen inside of EMDECS. These notes do not print on the invoice
7 - Notes : Any notes entered here will be printed on to the invoice
Unit Readying
When all labour has been completed and the information under the Summary tab verified, press the Unit Ready button.
This will remove the RO from your assigned work and you will not be able to access it again unless it is sent back to you by an Admin. When this happens, the line will turn red, and there will be notes stating what is missing from the RO
Select the RO and make any required corrections. When ready, select Unit Ready.
Other tabs in TechRO
There are two other tabs that technicians have access to under the Tech RO: Work in Progress and Time Sheet.
Work in Progress
To join an RO that is already in progress but was not assigned to you, click on the Work in Progress tab.
Anything in blue denotes that is the current labour that Tech is clocked on to
Click on the Clock icon next to a labour line to clock on to that RO
Time Sheet
This will display all of your activity for the current day. Use the icons in the top left corner to change your view.