
Who is this article for? Technicians using emdecs one's web client.
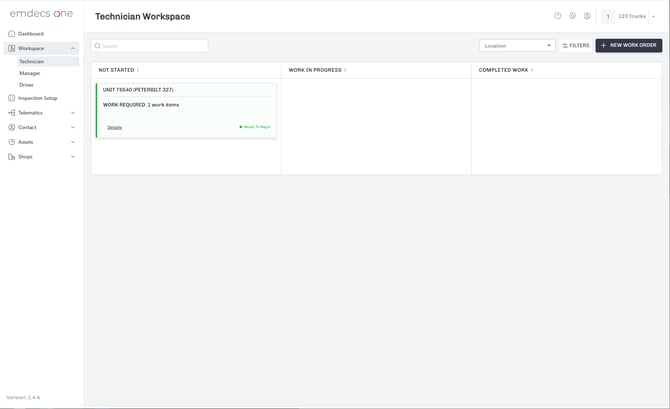
Begin by selecting Workspace > Technician from the side menu bar. This will show you your workspace, which is used to track work orders as they move through the process of being repaired. When you create a work order, it will be placed in the Not Started column and then move automatically to the Work in Progress column when you begin work on it. Once it's invoiced it will move to Completed Work, where it will stay for the next 24 hours in case you need to look at it again after invoicing:
To create a new work order, you need to enter its details. Clicking the New Work Order button will show you two options: Work Order and Estimate. Select Work Order and emdecs one will show you a blank form for creating one:
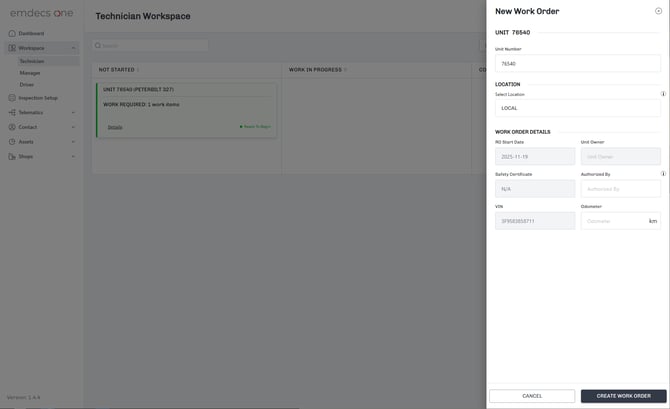
Click in the Unit Number field and begin typing the vehicle or trailer's number. emdecs one will home in on existing units in the system, and once you see the one you're looking for you can click it to select it.
NOTE: If the unit you're looking for is not yet in emdecs one, you'll need to take a moment to set it up before you can create your work order. Be aware that you may not have access to this feature depending on your repair shop's procedures.
Most of the remaining fields will be filled in automatically, but you'll need to manually add:
- Location. Clicking this field will show a list of all the repair shops you have access to.
You can also optionally add:
- Authorized by. This is a free-form text field, so you can enter the name of a person in your organization (including yourself), the owner or driver of the truck who asked for the repair to be made, contact numbers, and so on. Whatever your procedure is for authorizations, emdecs one supports it.
- Odometer: The odometer reading of the vehicle
Once you're done, click the Create New Work Order button and you'll be taken back to your main Workspace screen, a message confirming that the work order has been created will be show, and the work order's details card will be shown in the Not Started column. Its status will be Ready to Begin.
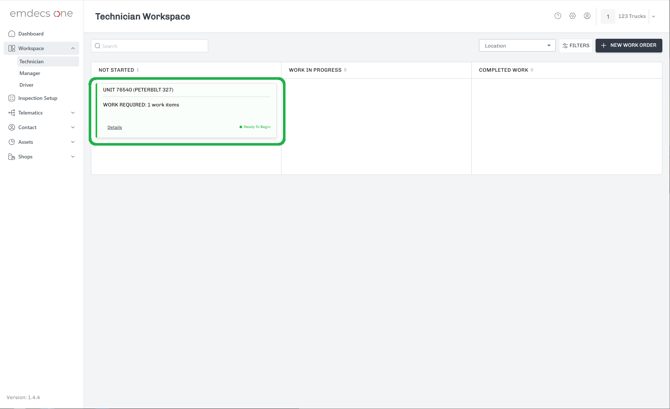
Click the Details link that shows on the work order's card. You'll be shown a copy of the currently empty work order:
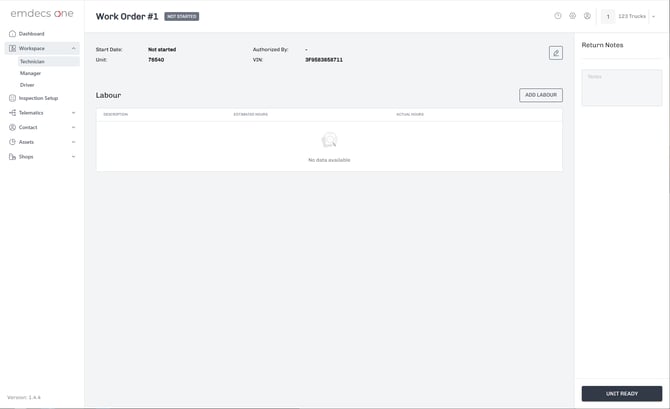
Click the Add Labour button and you'll be shown a side panel that lets you select labour items from a VMRS guide, from emdecs one's MOTOR integration (if applicable), or from a list of any unrepaired defects that have been reported by drivers or deferred from a previous work order:
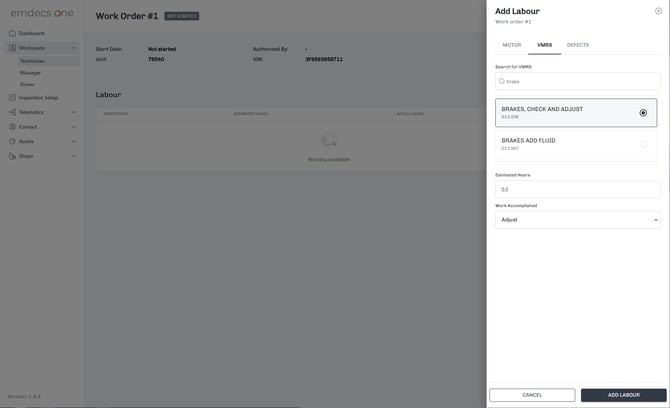
How to add labour using the MOTOR integration
How to add labour using the Defect tab
Once you've added one labour line, you can then start adding parts—in emdecs one's work orders, all parts have to be associated with a piece of labour. Begin by clicking on the labour for which the part will be used, then use the Add Part button.
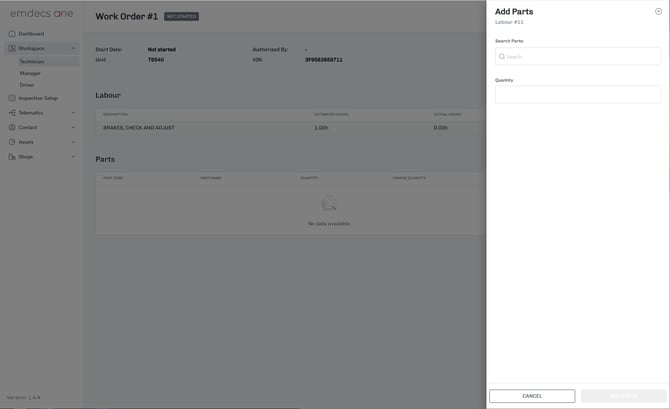
In the Search Parts box, start typing either the part number or the part's name and emdecs one will begin homing in on parts that match. NOTE: If the part you're looking for does not appear, that means emdecs one has not been able to find it in any of the integrations you've set up for parts. You'll need to manually add it to emdecs one before you'll be able to search for it. Be aware that you may not have access to this feature depending on your repair shop's procedures.
You can add as many parts as you like to this labour line. If there's another labour line that also needs parts added to it, click it and emdecs one will save the parts you've added to this first labour, and then the parts panel at the bottom of the work order will refresh to its blank state. You can then use the Add Part button again to add parts to this new labour line.
If you want to go back to seeing the first labour line's parts, click on that labour line again. The parts panel will refresh again, showing you the parts you added earlier. You'll also be able to add or delete parts now if you've changed your mind about which ones need to be used for the repair.
Continue adding labour and parts until you've finished the work order.
Unit Ready
When you finish with a work order it is Unit Ready. You'll need to tell emdecs one when you reach that point. To do that, look in the lower right hand corner of the work order screen. There's a button there named Unit Ready, which you'll need to click. When you do, emdecs one will check the work order for anything that might be missing or need correcting, then let you know what they are. If there aren't any, the work order screen will close, the work order will be marked for review by your manager, and it will move into your Completed Work.
You can then select the next work order assigned to you or otherwise continue your day.